Ultimate Guide to the Unity HDRP Water System: Setup, Body Types, and Performance
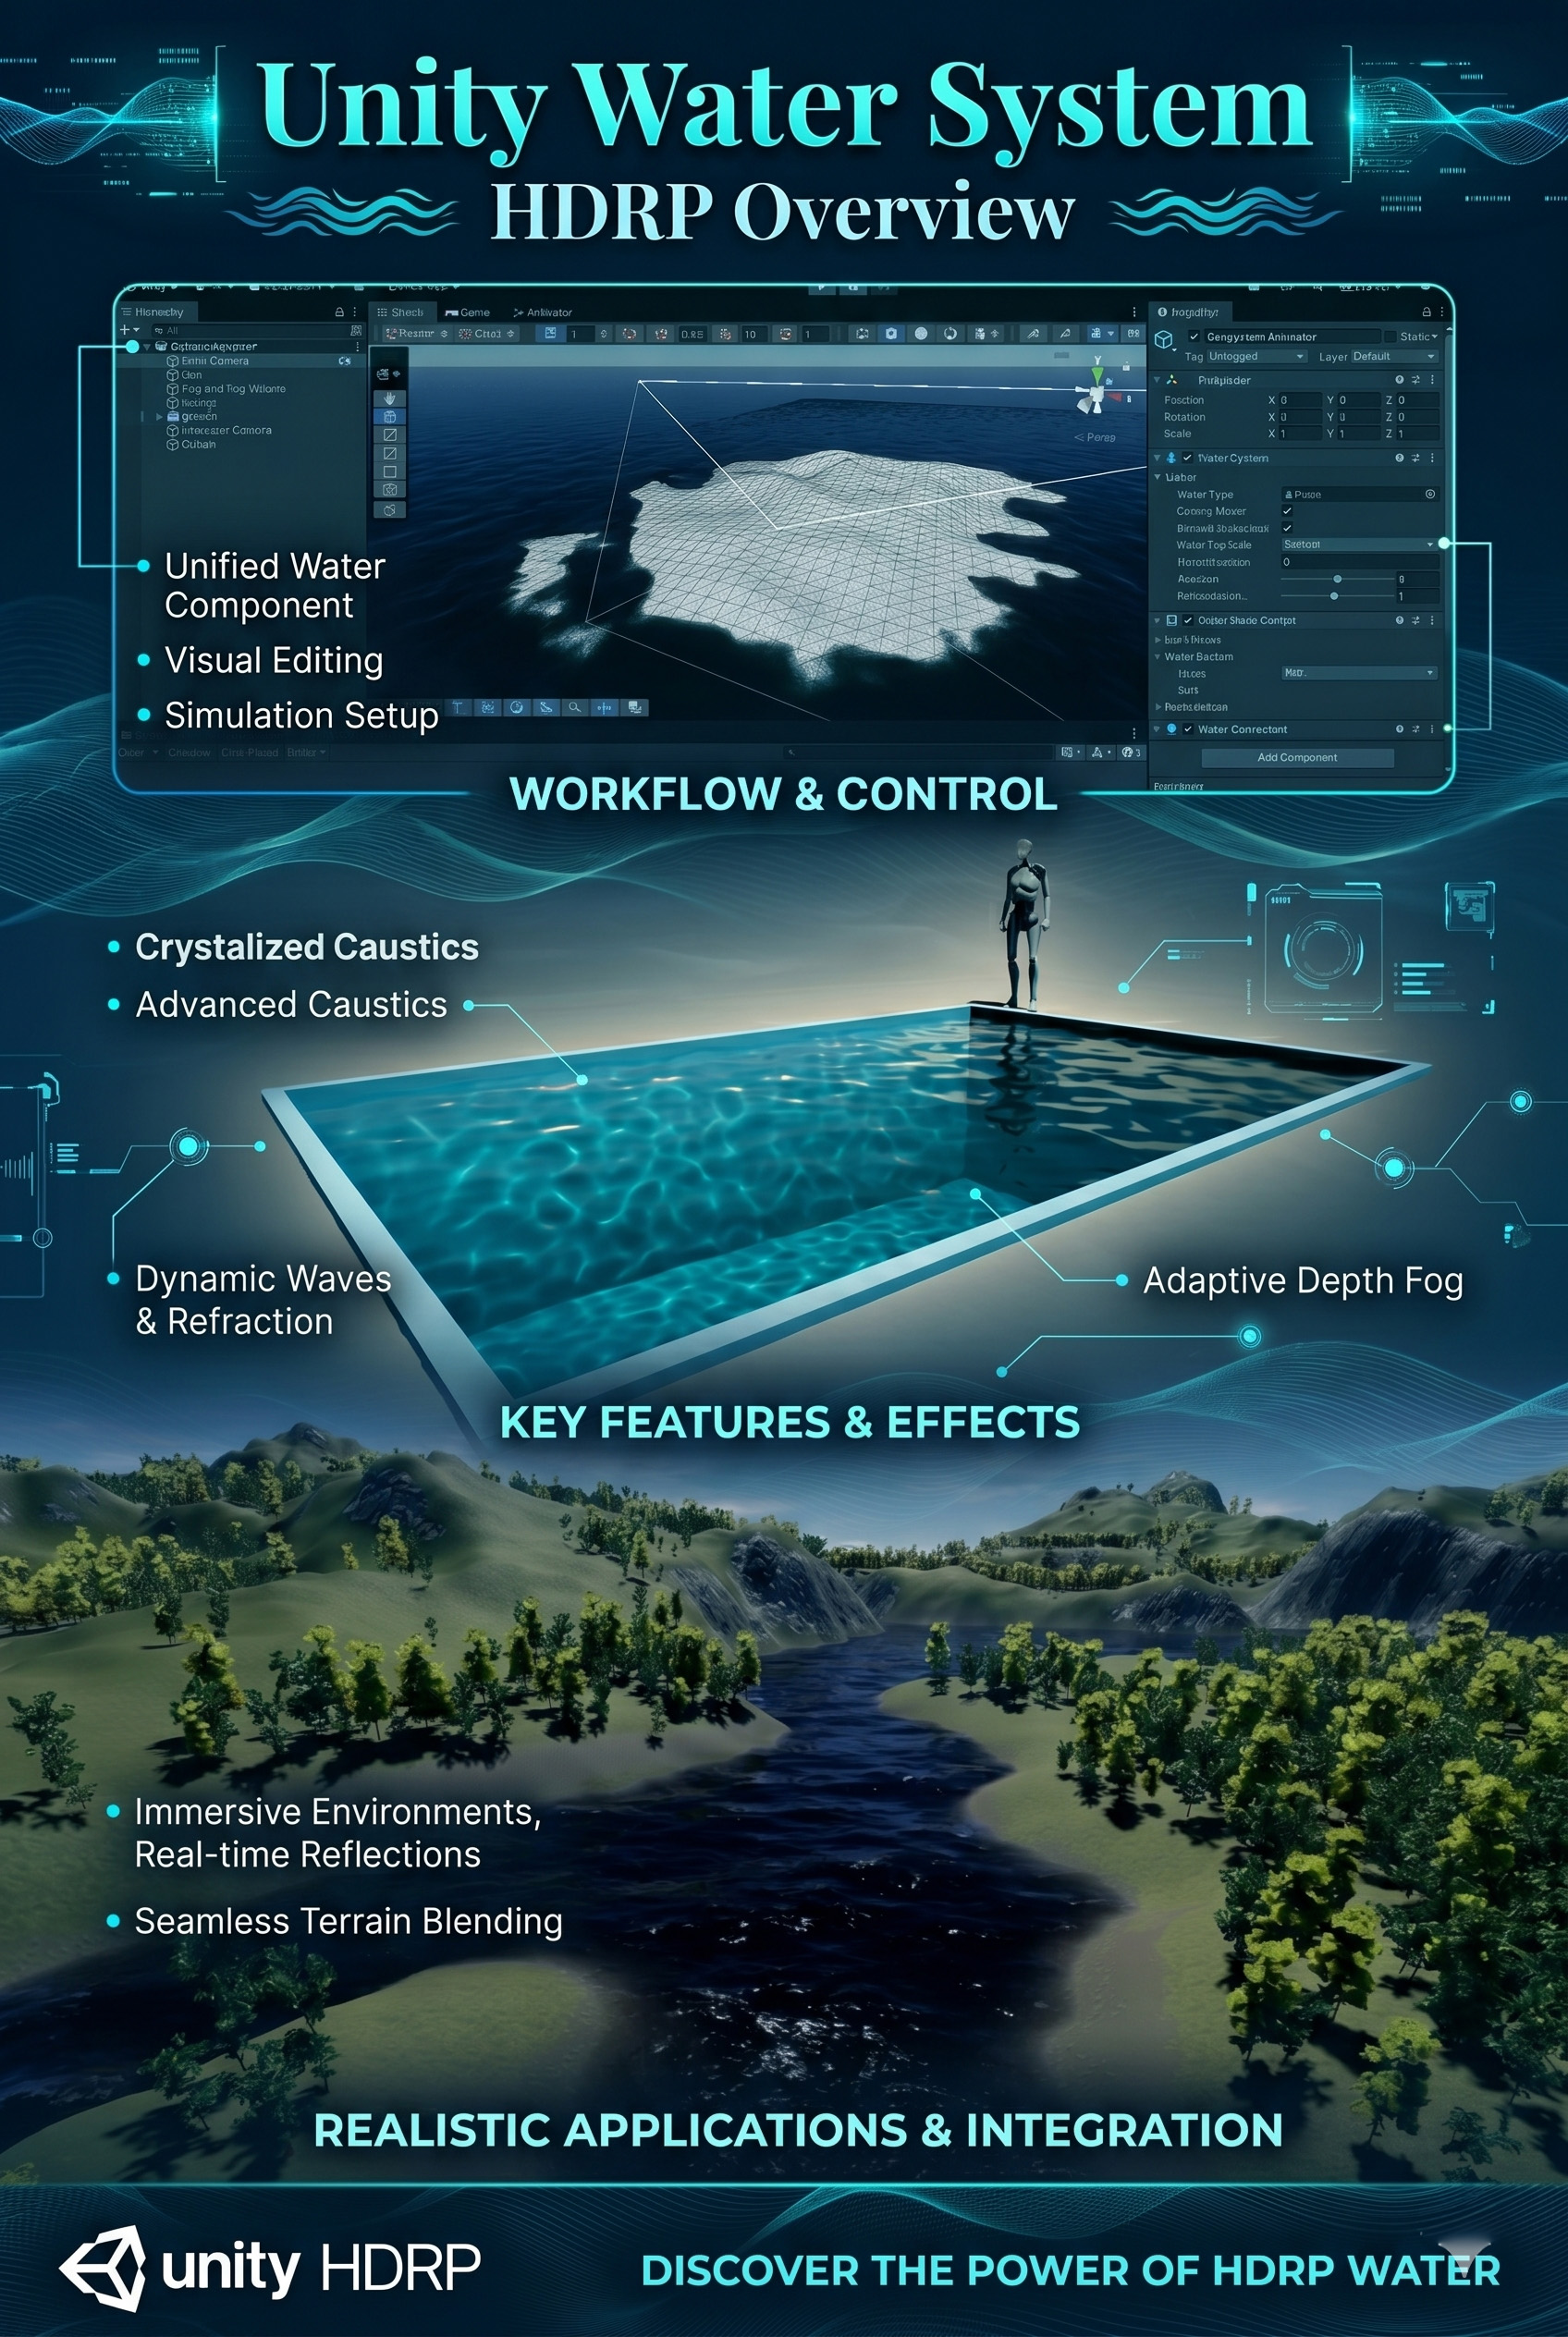
Creating realistic water has traditionally been one of the biggest challenges in game development. Fortunately, Unity’s High Definition Render Pipeline (HDRP) features a highly advanced, built-in Water System. Whether you are rendering a serene swimming pool, a muddy river, or a turbulent stormy ocean, the HDRP Water System provides physically plausible properties to bring your scenes to life.
In this guide, we will break down how to enable the HDRP water system, explore the different water body types, analyze performance costs, and answer whether this system is ready for mobile game development.
How to Enable the HDRP Water System
By default, the Water System is inactive to save performance. If you are upgrading a project or starting fresh, you will need to activate it globally and within your frame settings before you can see it in your scene.
Follow this step-by-step basic workflow to enable water:
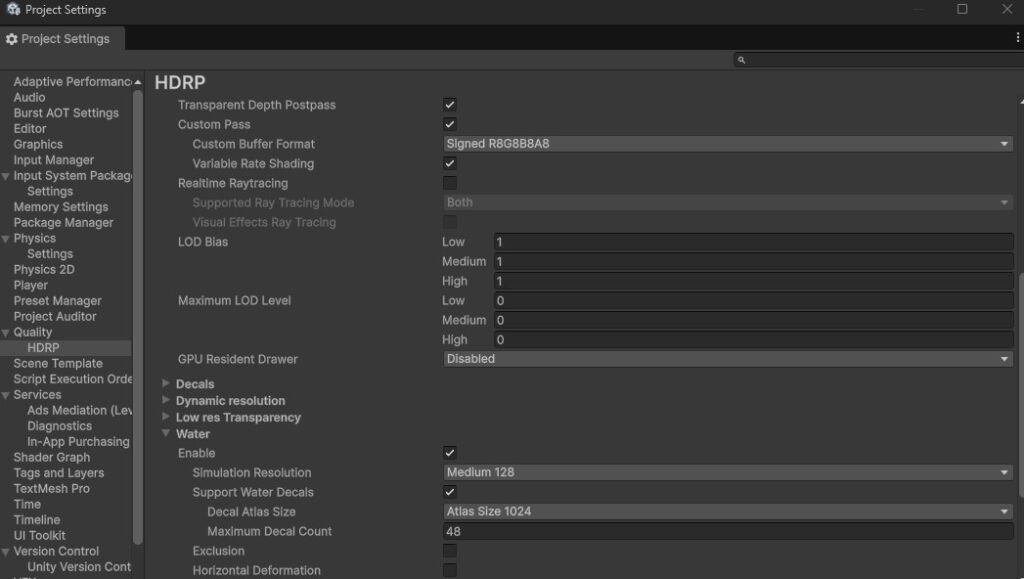
- Enable Water in Quality Settings: Navigate to Edit > Project Settings > Quality > HDRP. Scroll down to the Rendering section and check the Water box.
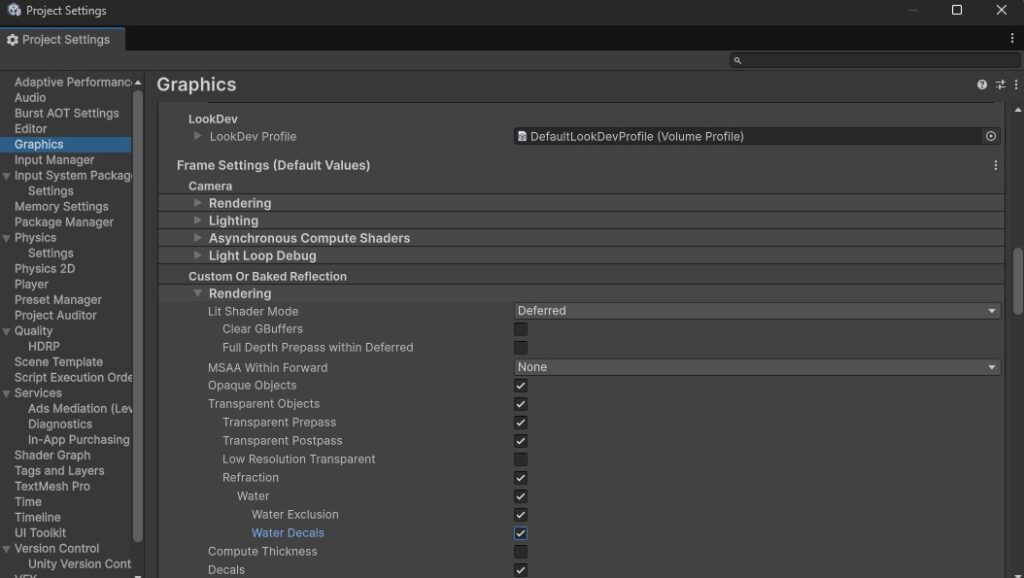
- Enable Water in Frame Settings: Go to Edit > Project Settings > Graphics > HDRP Global Settings > Frame Settings. You must enable water rendering in three specific places under the Rendering tab:
- Camera
- Realtime Reflection
- Baked or Custom Reflection
This step is what tells HDRP to actually calculate and draw the water effects (like depth, color, and reflections) across your entire scene. Here is exactly where to click:
1. Find your Global Volume Look in your Hierarchy window (the list of everything in your scene on the left). Search for an object that controls your environment. In standard Unity HDRP templates, it is usually named Sky and Fog Volume, Global Volume, or Directional Light. (If you do not have one, you can create one from scratch: Right-click in the Hierarchy > Volume > Global Volume).
2. Open it in the Inspector Click on that Volume object in the Hierarchy. Now, look over at your Inspector window on the right. You should see a component attached to it simply called Volume. Inside that component, there is usually a list (a “Profile”) containing things like “Visual Environment,” “Volumetric Clouds,” or “Exposure.”
3. Click “Add Override” Scroll to the very bottom of that specific Volume component in the Inspector. Click the wide button that says Add Override.
4. Select the Water Override A small pop-up menu will appear. You can find what you need in two ways:
- Search: Type “Water” into the search bar at the top of the pop-up and select the Water option that appears.
- Navigate: Click into the Rendering folder (in some versions, it may be under the Lighting folder) and select Water.
5. Enable the State Now, the “Water” override will be added to the bottom of the list in your Volume component.
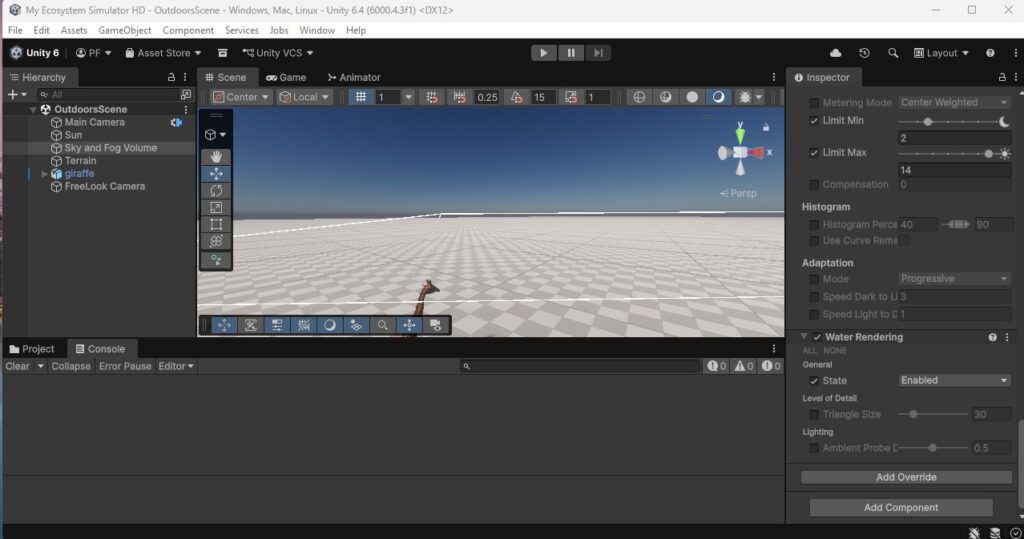
- Click the small dropdown arrow next to the word “Water” to unfold its settings.
- You will see a property called Enable (or sometimes State).
- First, check the small checkbox on the far left of the word “Enable” (this tells Unity you want to override the default pipeline setting).
- Second, check the actual box on the right to turn the water rendering ON.
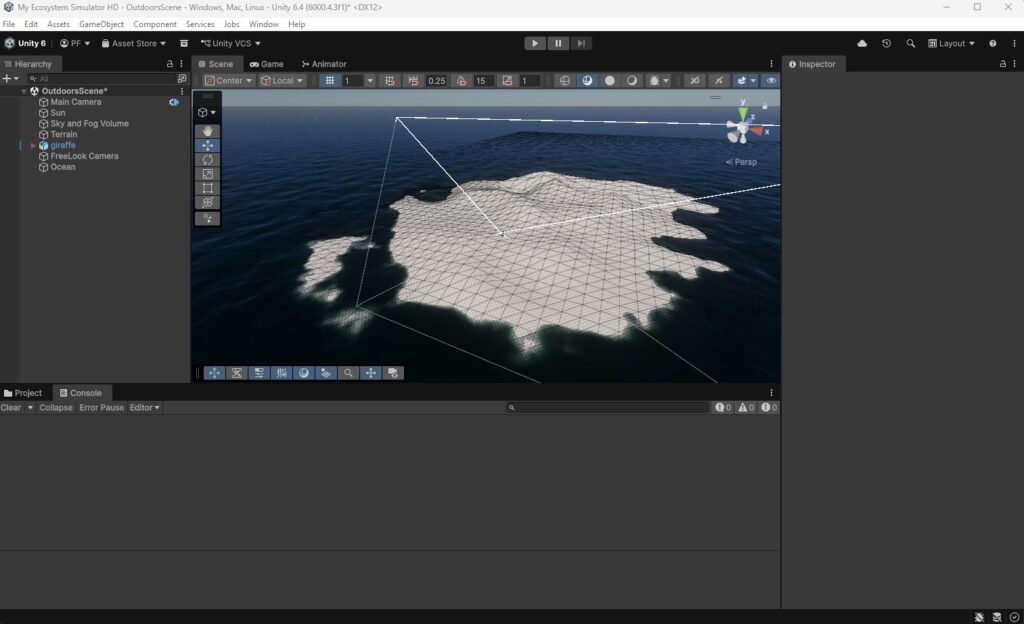
Add a Water Surface to your Scene: Right-click in your Hierarchy and navigate to Game Object > Water Surface, then select your desired surface type.
(Pro-Tip: If the water surface movement lags in your Scene view, open the Effects menu in the Scene View Options toolbar and enable Always Refresh).
Introduction to Water Body Types: Oceans, Lakes, and Rivers
HDRP provides three distinct water surface types, each optimized with specific capabilities for different environmental needs:
1. Pool
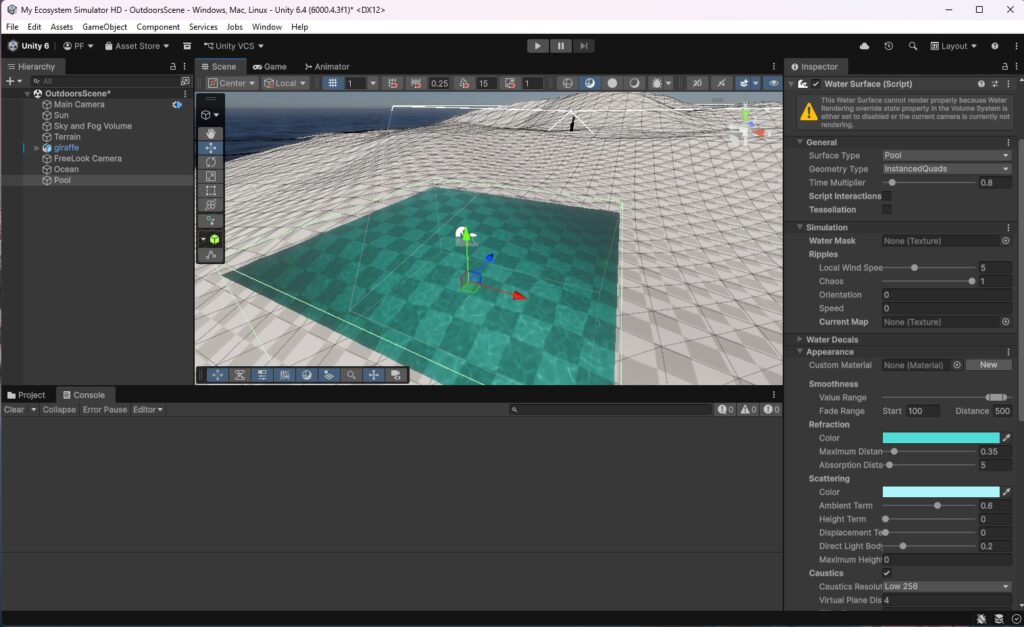
The Pool surface type is the simplest and most performance-friendly option. It is ideal for calm, contained bodies of water like swimming pools or puddles. While you can still tweak color, refraction, scattering, and caustics, it lacks the complex multi-band wave simulations found in larger bodies of water.
2. River
The River type introduces flow and directional movement. It supports multi-band simulation properties, allowing for ripples and currents. It also supports dynamic surface foam and advanced caustics, making it perfect for winding streams or rapidly flowing muddy water.
3. Ocean, Sea, or Lake
This is the most complex and visually stunning water type. It utilizes multi-band simulation to generate large, complex wave patterns and swells that react to wind speed and current values. This surface type supports rolling wave tips, surface foam generated by distant winds, and sophisticated underwater rendering if you enable the Underwater option.
Performance Costs and Minimum Requirements
Rendering realistic water requires heavy calculations. Because the Water System relies on HDRP, it naturally requires compute shader-compatible hardware (High-end PC, Xbox Series X/S, or PlayStation 5).
If you want to optimize your water to hit your frame rate targets, you must balance visual fidelity with performance. Here are the primary performance costs to watch out for:
- Script Interaction (CPU vs. GPU): By default, water simulation runs on the GPU. If you enable script interaction (for example, to make objects dynamically float on the waves), the simulation will run on both the GPU and the CPU. This doubles the number of calculations Unity performs. Only enable script interaction if you absolutely need buoyancy or height-data reads.
- Simulation Bands & Fade Ranges: Ocean and Lake surfaces require more simulation bands than Pools, demanding more memory. To improve performance, lower the
Startvalue in the Fade Range settings to fade out the wave simulations closer to the camera. - Levels of Detail (LODs) & Tessellation: Large water grids demand heavy memory. Reduce the
Max Grid Sizeand lower theNum Levels of Detailin your Water Volume Override to claw back frame times. - Refraction Strength: The
Maximum Distanceproperty determines how deeply the refraction effect renders into the water. Lowering this value conserves memory at the cost of transparency depth. - Resolution Settings: Specifying lower resolutions for masks, decals, foam, and caustics will drastically reduce your VRAM footprint.
Is the Unity HDRP Water System Mobile Ready?
No, the HDRP Water System is not mobile-ready. HDRP is specifically engineered for high-end hardware, such as modern gaming PCs and current-generation consoles. Mobile GPUs simply do not have the compute power, memory bandwidth, or thermal headroom to handle HDRP’s volumetric lighting, compute-shader-driven multi-band water simulations, and deep refraction layers.
The Mobile Alternative: If you are targeting Android or iOS devices, you must build your project using Unity’s Universal Render Pipeline (URP). While URP is lighter, Unity introduced a native URP Water System in newer versions (Unity 2023+), which provides scalable, mobile-friendly water rendering without the extreme performance costs of HDRP.
Here are the two additional sections formatted and optimized for your article, complete with authoritative links to official documentation and highly recommended video resources.
Official Unity Water System Documentation Guide
Navigating the official documentation is the most reliable way to master the technical intricacies of rendering water in HDRP. Because the pipeline continually evolves with each Unity Tech Stream, referencing the primary sources ensures you are using the correct settings for your specific editor version.
Here are the top official Unity resources you should bookmark:
1. The Core HDRP Water Workflow
Link: Use the Water System in your Project
Why you need it: This is the primary manual page for setting up water. It expands on the basic workflow and provides detailed, step-by-step configuration examples. If you want to know exactly how to adjust properties to turn a calm, clear swimming pool into a dark, muddy, debris-filled river, this page gives you the exact parameter tweaks (Scattering, Refraction, Absorption Distance) needed to achieve those specific looks.
2. Water System Capabilities & Limitations
Link: Capabilities of the Water System
Why you need it: Before building a complex scene, it is vital to understand what the system can and cannot do. This document breaks down advanced interactions, such as how to generate wind-driven foam, customize caustics, and align objects to the water surface using normals.
3. Understanding Water Simulation Mathematics
Link: Water System Simulation
Why you need it: The core of HDRP’s water implementation relies on Fast Fourier Transform (FFT) simulations. This page explains how Unity uses different “Simulation Bands” (Ripples, Agitation, and Swells) to generate procedurally accurate waves that react mathematically to your directional wind and current settings.
4. The Unity WaterScenes Sample Project
Link: Unity-Technologies/WaterScenes GitHub Repository
Why you need it: Sometimes the best way to learn is by deconstructing a finished project. Unity provides an official repository featuring pre-configured scenes (an island ocean, a flowing river, and a pool) that perfectly showcase how to integrate water deformers, custom render textures, and edge foam in a production-ready environment.
Top YouTube Water System Unity Tutorials
While documentation is great for technical reference, video tutorials are invaluable for seeing the visual results of parameter changes in real-time. Whether you are adding localized ripples or dealing with underwater volumetric fog, community and official tutorials can bridge the gap between theory and practice.
Each video tutorial is a combination of possibilities, building a type of water render that can guide you to your desired concept water art design.
Here are some of the best topics and series to search for to master the HDRP water system:
1. Step-by-Step Multi-Part Series (e.g., Unity 6 Water System)
For beginners, finding a multi-part series is highly recommended. Many top creators break down the water system into digestible episodes covering:
- Part 1: The Basics: Setting up the water surface, adjusting tessellation to optimize triangles, and controlling wave height.
- Part 2: Appearance & Underwater Rendering: Tweaking light scattering, screen space reflections, and using volumetric fog to simulate underwater visibility limits.
- Part 3: Foam, Deformers & Excluders: Learning how to prevent water from rendering inside the hull of a boat (excluders) or creating custom wakes behind moving objects (deformers).
2. Official Unity Deep Dives
Unity’s official channel frequently releases dense, developer-focused deep dives. These videos are perfect for understanding the intent behind the engineering. They visually demonstrate how to pass caustic buffers from the water surface to nearby materials (like projecting light onto a glacier wall) and how to use full-screen custom pass shader graphs to create realistic water-line blur when the camera is only partially submerged.
3. Custom Water Shaders in URP
Because the HDRP water system is not suited for mobile devices, developers targeting cross-platform releases should look for URP Shader Graph tutorials. These tutorials walk you through building a lightweight, highly convincing water shader manually, covering normal map-based refraction and depth transparency without the heavy compute shader costs.
This official Unity tutorial visually breaks down advanced water rendering techniques, including projecting caustics onto environmental geometry and creating a custom underwater post-processing waterline.